Meta Business Suite allows you to manage both Facebook and Instagram pages at once. It is called crossposting. You can crosspost a banner, image or video or up to 10 media files (videos and images). This feature saves time! Let’s learn how to do it.
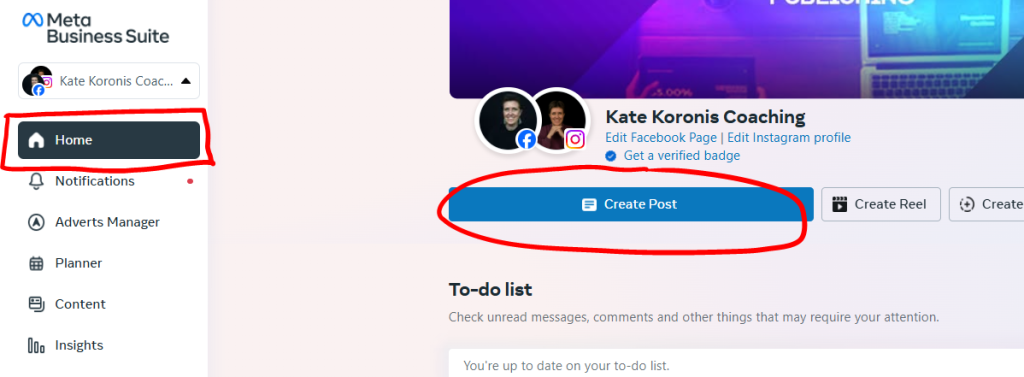
We will start from the Home Page of your Meta Business Suite
Note: If you have multiple business portfolios (more than one page), ensure you select the page you need in the drop-down menu

Step 1: Navigate to the Home page of the Meta Business Suite
Click on the “Create Post” to start preparing your post.
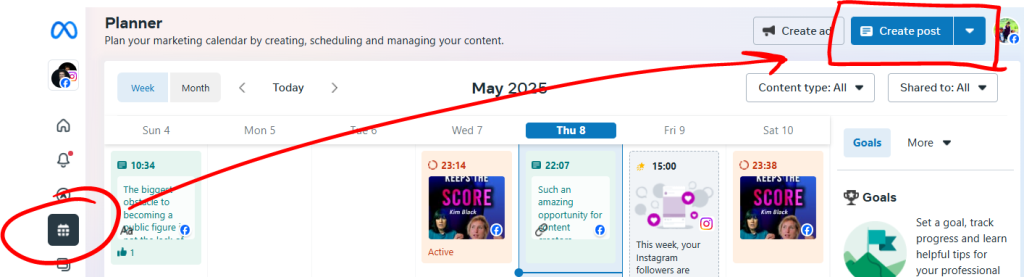
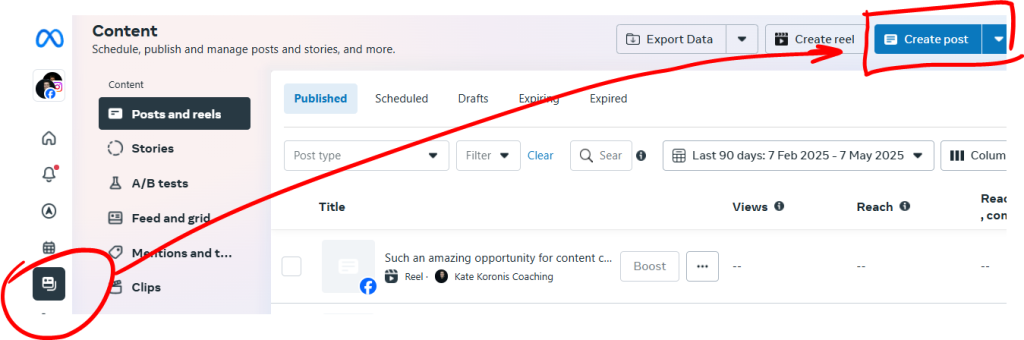
There are more places you can find the same button
Planner Section
Content Section
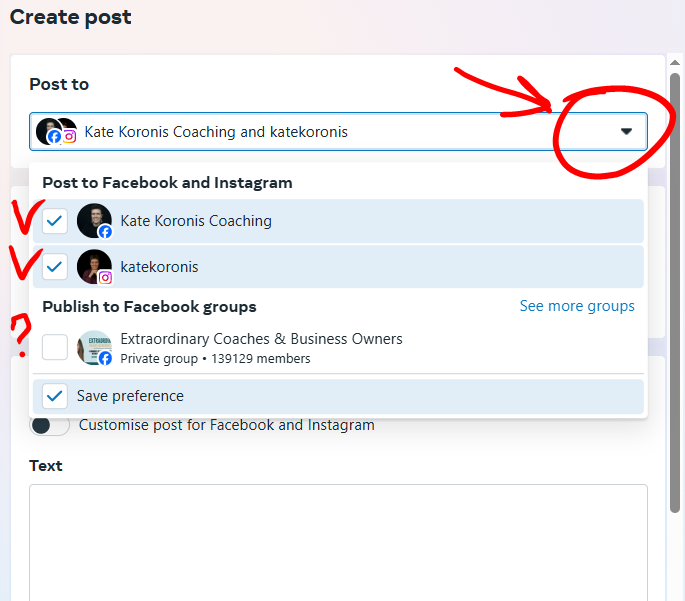
Step 2: Choose the Pages, Accounts and Groups you want to Publish to
Start with choosing both Facebook and Instagram to be published to.
You may also choose groups. Just ensure you are an active member of the group and your post is welcomed, or the group belongs to you. You can select up to 3 groups.
Tip: You should know what is allowed to be posted in each of the groups you select
Save preference if you want this setting to remain for the next posting.
Step 3: Prepare the post content
- Add the Image
- Fill out the Text box with the reason you think this post will be beneficial for readers
- Add relevant hashtags (3-5)
- If you are advertising the YouTube Video Premiere, then add a Call To Action: Invitation to find the link in stories

Step 4: Schedule the post or publish right away
Post Scheduling
Turn on the Scheduling Options to be able to see the available calendars.
Once your time and date are selected, hit the blue “Schedule” button.
You may check what you have scheduled in the Content Section of the Meta Business Suite.
Posting Now
If the Scheduling options are turned off you will be able to see the button “Publish”. This will send the post to your feeds right away.


